Equipment and Materials used – The Paper
Fomatone Nature 532- II
Within a year of starting to do my own darkroom prints I had moved permanently onto fibre based paper. I am currently using Fomatone 532 (see separate article) but used Kodak Ektalure for many years until Kodak ceased production of this much loved paper. Previous to that I was using Agfa Record Rapid. I generally use the papers at grade two (medium to low contrast) which is the default setting for the paper without filters.
It is still relatively early days for me with the Fomatone so I am still getting used to its characteristics. I am happy with it though there are a few things I want to keep an eye on. It almost seems as if the images aren’t as sharp as I am used to, as if the tones are slightly blurred together. The blacks don’t seem as deep as with the Ektalure either, but as I said it is early days. I won’t know for sure until I have started printing duplicate images so I can compare them side by side. So far I have only printed new stuff so I have no direct comparison available.
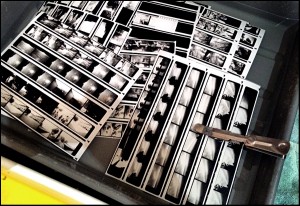
As far as rough prints and contact sheets go I tend to use cheap shops own brands of paper. It is pointless wasting good, expensive paper for this. I have been using silverprint‘s own brand as well as buying my Fomatone from them.
Tips for using fibre based paper
Fibre based papers tend to be slower and slightly more temperamental than Resin Coated paper so keep the chemicals fresh as the paper is more likely to stain. Also, ensure that you wash the prints thoroughly and give them more time in the baths than you would if you are used to RC paper. Especially the stop and fix.
Be more careful as well when handling it with the tongs. It is easily dented, marked or creased.
If your Fibre Based prints curl when drying then it may be worth hanging them up back to back. While still wet attach the non print sides to each other and then peg them together and hang them to dry.
If you are printing for presentation or exhibition then it is worth stretch drying the paper. Use a sheet of glass and after wiping off all excess water from the print, place it flat on the glass. Wipe again with a chamois leather (or similar), starting from the centre of the print working your way to the edges. This pushes out any air bubbles. Then stick the edges down with Gum Strip tape, which has been dampened on a sponge. Always work with as little water as possible. Leave to dry in a space with as constant a heat as possible.
It is worth noting that when drying like this there is little or no ‘dry down’, because the paper does not shrink when it dries. The molecules and grain of the print do not get closer together, therefore the print does not darken when dry. If you previously printed slightly light to compensate for this, then it will no longer be necessary to do so.